Usually when working with ASP.Net Identity all the necessary components are added with the existing project scaffolding, but recently I needed to add an Identity database to an existing project. Below is simple way to accomplish this.
Step 1 – Install NuGet packages
From the Package Manager Console run:
Install-Package Microsoft.AspNet.Identity.EntityFramework
(this will install AspNet.Identity.Core as well)
Step 2 – Create Context Class
Create a new empty Entity Framework Code First context. Replace the default class definition with:
...
 using Microsoft.AspNet.Identity;
 using Microsoft.AspNet.Identity.EntityFramework;

 public class SecurityDbContext : IdentityDbContext<IdentityUser>
 {
...
Update your web.config file to point the new context to a valid SQL Database.
note – If your context class overrides OnModelCreating, make sure base.OnModelCreating() is called
Step 3 – Enable Migrations & Populate Seed Method
In Package Manager Console run:
Enable-Migrations -EnableAutomaticMigrations
Then, optionally, you can create additional users or roles as needed in \Migrations\Configurations.cs:
protected override void Seed(MyApplication.Models.SecurityDbContext context)
 {
 var um = new UserManager<IdentityUser>(new UserStore<IdentityUser>(context));

 var user = new IdentityUser()
 {
 UserName = "admin"
 };

 IdentityResult ir = um.Create(user, "1234#abcD");

 }
Step 4 – Update Database
In Package Manger Console run
Update-Database
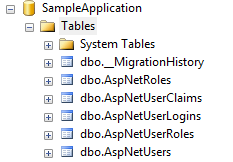
The Identity tables should now exist in the database: